Models
Browse AI models, view training history, and manage image datasets.
The Models section collects the AI models available to your account. From here you can create or import a model, open its dataset, start training, and download exported results.
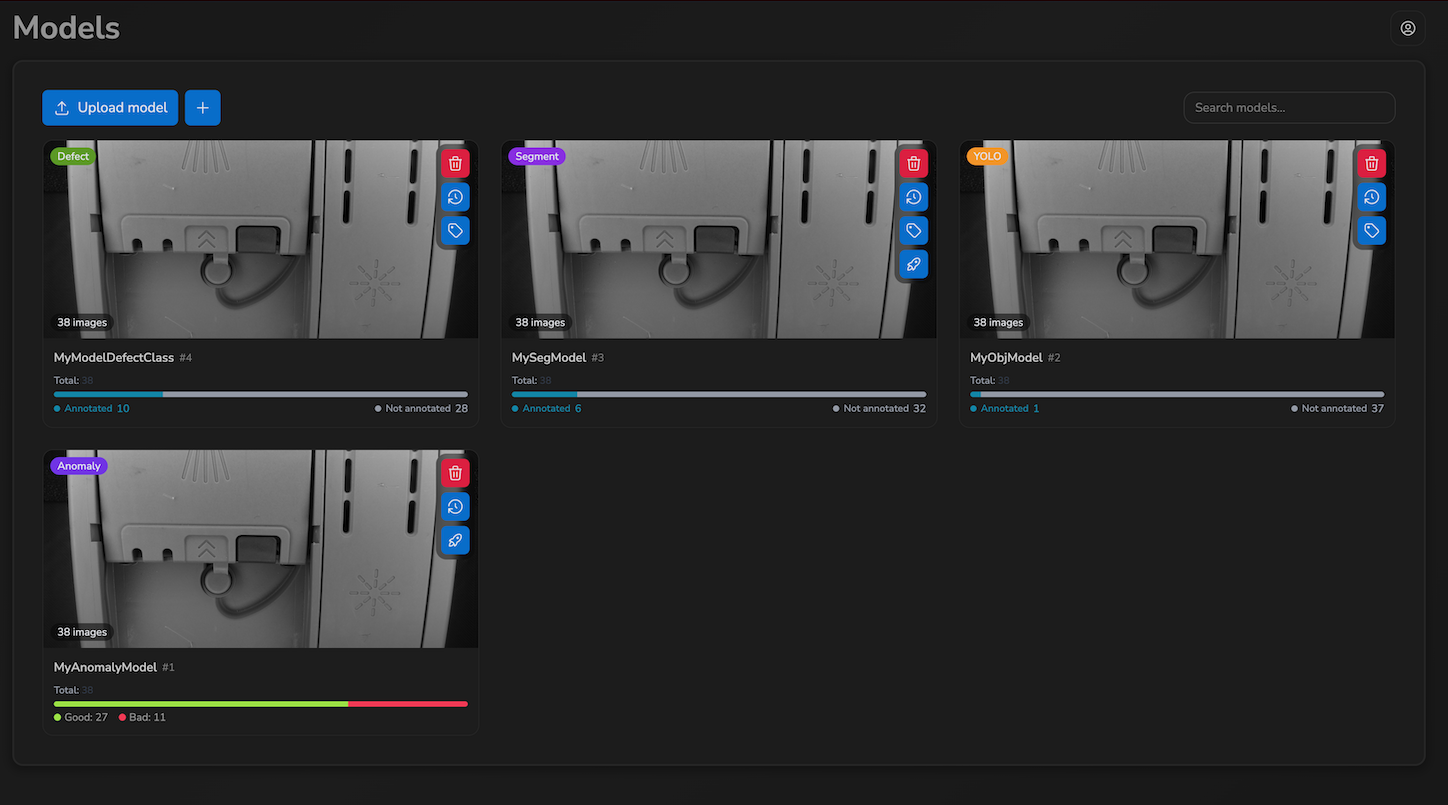
Each model is displayed as a card with a dataset preview, statistics, and contextual actions.
The Models section is not visible to Backoffice users. Some actions also depend on the license associated with the model type.
Model Types
BIION-D Cloud supports the following model types. Each type is identified by a badge and follows a different workflow.
| Model Type | Description | Workflow |
|---|---|---|
| AnomalyDetection | Detects anomalies from compliant and defected examples. | AnomalyDetection |
| Object Detection | Detects and locates multiple objects with bounding boxes. | Object Detection and Segmentation |
| Object Segmentation | Outlines objects with pixel-level annotations. | Object Detection and Segmentation |
| Defect Classification | Anomaly Detection training followed by object annotation and second-stage training. | Defect Classification |
The types available in the creation dialog depend on the account license. See Licenses and usage.
Model List
The main Models page shows a grid of cards. The upper toolbar contains:
- Upload model, to import a
.zipfile; - the + button, with the Create model tooltip;
- Search models…, to filter the list by name.
The list displays six models per page. When a search has no results, the page shows No matching models.

Card Contents
Each card can display:
- a large dataset preview image;
- the model type badge;
- the model name, ID, and image count;
- a dataset summary bar for classified or annotated images;
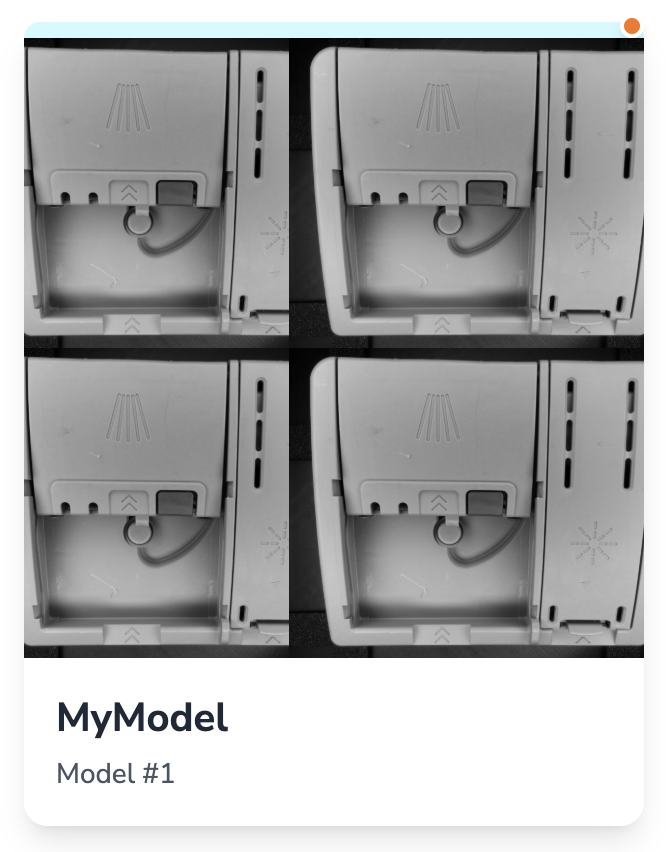
- an orange dot when training has just completed;
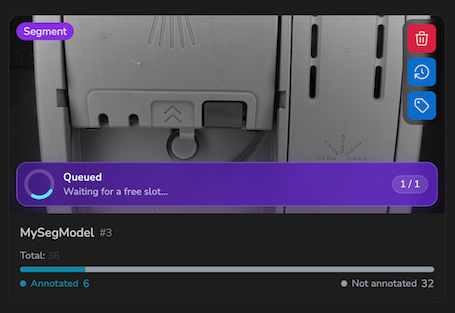
- a status overlay while a job is queued, training, validating, or uploading results.
Card Actions
When you hover over a card, an action bar appears in the top-right corner.
| Action | UI Tooltip | Purpose |
|---|---|---|
| Delete | Delete model | Deletes the model after confirmation. |
| History | Training history | Opens training runs and exported results. |
| Annotation | Annotate | Opens the editor for compatible models and phases. |
| Training | Train model | Starts a job when the dataset requirements are met. |
The card training action appears after a requirements check. Unlike Train in the gallery, it starts the job directly without showing the detailed pre-flight summary.
If the required license is missing or expired, the affected controls are disabled and show License not available for this model type.
Training Status
Training status is displayed as an overlay on the card preview.
| State | Message or Indicator |
|---|---|
| Queued | Queued, Queued…, or Position N/M |
| Preparing | Preparing training… |
| Training | Training… |
| Validation | Validating models… |
| Upload | Uploading models… |
| Mask generation | Generating masks…, for compatible workflows |
| Completed | Training Completed and an orange dot |
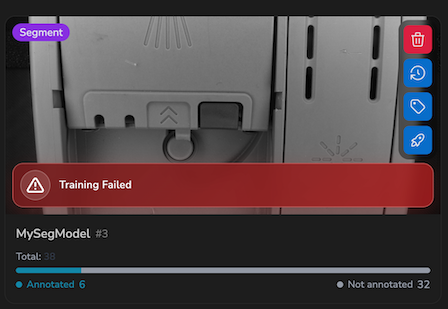
| Error | Training Failed |
Opening the model or its training history marks the completion notification as read.
If another training run is active, the new job enters the queue and its position is updated automatically. The current interface does not provide a control for manually cancelling a queued job.
Model Detail
Selecting a card opens the gallery, which shows:
- the Models breadcrumb to return to the list;
- the model name and type;
- a License missing or expired warning when applicable;
- an image gallery initially displaying 12 images per page;
- Filter, View/Edit, Show Annotations, Annotate, and Train, when applicable;
- the history icon button, identified by the View training history tooltip.
For more details, see Image gallery and Annotation interface.
Training
Starting a Training Run
You can start training from the card with Train model or from the gallery with Train.
The gallery displays a Pre-flight summary with the required counts. Its status is Ready when all requirements are met or Incomplete when images or annotations are missing. In that case, Start Training remains disabled.
Requirements depend on model type and phase:
- AnomalyDetection: at least 20 good and 5 defected images;
- Object Detection and Object Segmentation: at least 5 annotated images;
- DefectClassification, first phase: at least 5 good and 5 defected images;
- DefectClassification, second phase: all defected images must be annotated.
Training Queue
If another training is already running, the job enters the queue. The card shows Queued… or Position N/M.
Training Error
If an error occurs during training, the card shows Training Failed and the training run is not completed.
Training History and Download
Open Training History
Select Training history on the card or the history icon button in the gallery.
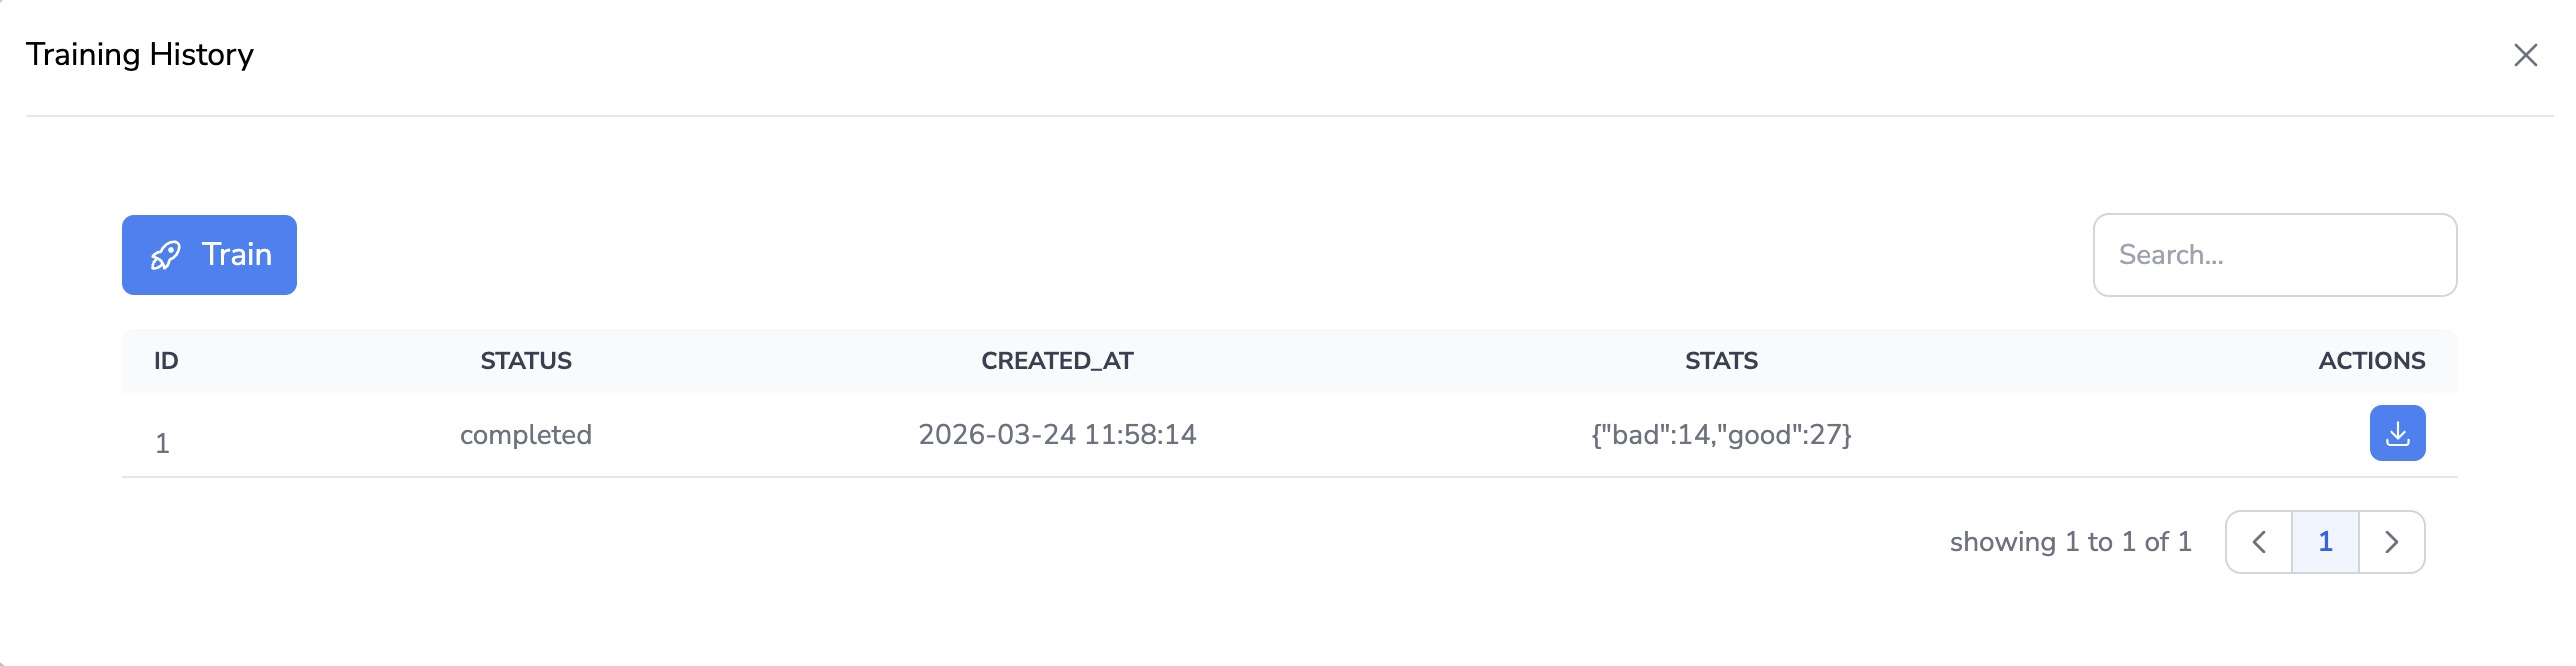
Find a Completed Run
The Training History dialog supports search and initially hides failed or cancelled sessions with Hide failed / cancelled. Expand a completed session to display its results.
Select Model and Target Device
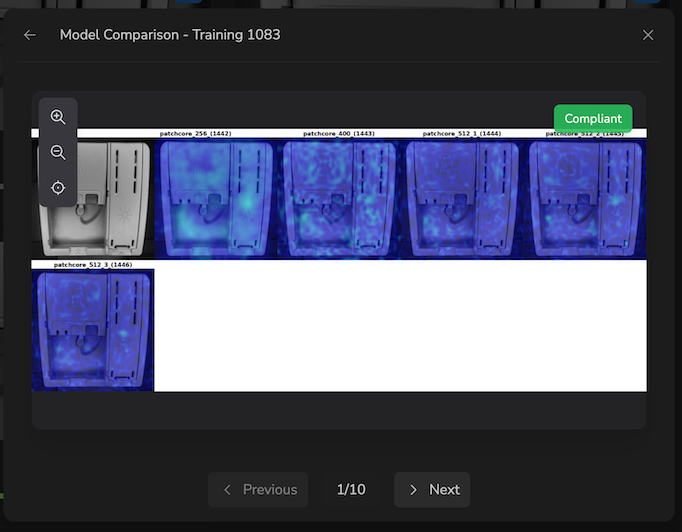
Exportable results are ordered by score. The best result is preselected and marked suggested. Compare can also be available for AnomalyDetection. Then select Target device….
Download
Select Download. The device is used to configure the export; when processing completes, the browser downloads a local ZIP file named like model_<id>_device_<id>.zip.

Creating a Model
Open the Creation Modal
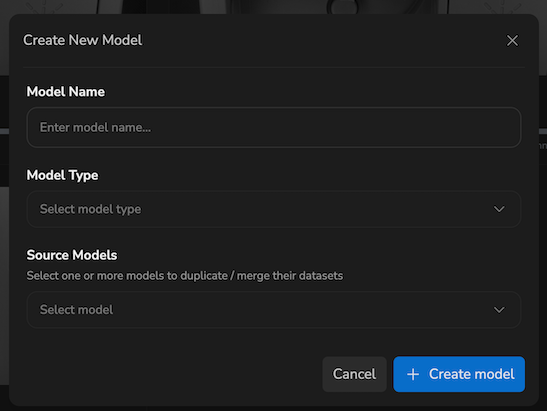
Select the + button in the upper toolbar to open Create New Model.
Enter Model Name
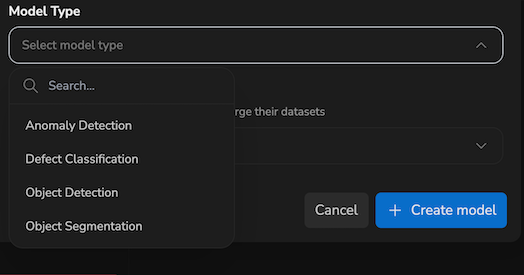
Complete Model Name and select Model Type.

The selected type determines the workflow and compatible source models.
Select Source Models (optional)
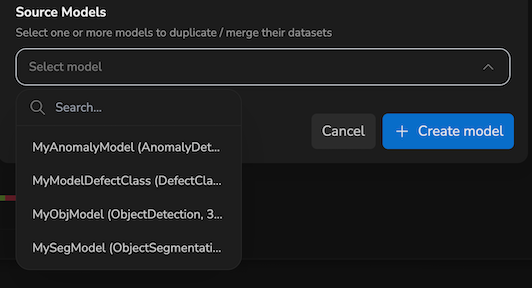
Choose one or more Source Models to duplicate or merge their datasets. Each source displays compatible options such as Labels, Annotations, or Only images imported.
Sliders control the percentage of images to import, separating defected/annotated images from good/unannotated images when available.
| Source → Target | What is Imported |
|---|---|
| AnomalyDetection → AnomalyDetection | Images + Compliance labels (optional) |
| YOLO → YOLO (same family) | Images + Annotations (optional) |
| AnomalyDetection → YOLO | Images only |
| YOLO → AnomalyDetection | Images only |
| AnomalyDetection → Defect Classification | Images + compliance labels — source model required |
Creating a DefectClassification model requires at least one AnomalyDetection source. Labels are included, and the initial selection imports all defected images and a portion of good images. The first training phase starts automatically after creation.
Create
Select Create Model. When creation succeeds, Model created successfully! appears and the list refreshes.
Importing a Model ZIP
Select Upload model and choose a .zip file. Upload starts immediately and shows Uploading model…. When it finishes, Model uploaded successfully! appears and the page refreshes.
Next Steps
- AnomalyDetection — full workflow for anomaly detection models
- Object Detection and Segmentation — annotation and training workflow for YOLO models
- Defect Classification — complete workflow for the hybrid model
- Image gallery — browse, filter, and manage a dataset
- Annotation interface — create and edit bounding boxes, polygons, and masks
- Licenses and usage — review available features and usage
- Devices — connect and manage your hardware devices
- Workspace — configure workspaces for training