ObjectDetection&Segmentation
Full workflow for YOLO models — annotation, training, and downloading results.
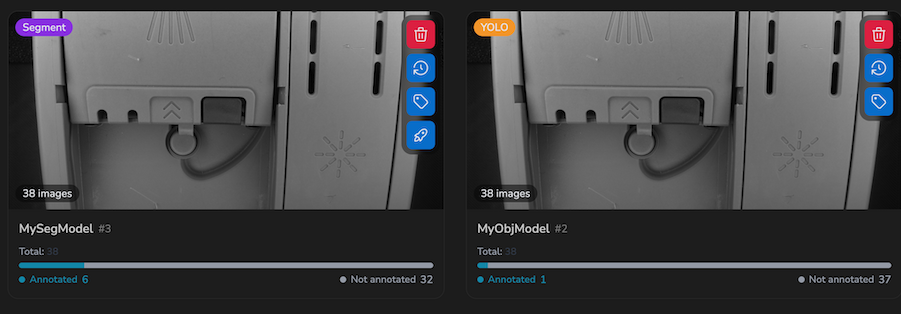
The available YOLO models are Object Detection and Object Segmentation. They share the same workflow based on the annotation interface integrated into BIION-D Cloud.
| Variant | Card Color | Description |
|---|---|---|
| Object Detection | Indigo | Detects multiple objects with bounding boxes |
| Object Segmentation | Violet | Segments and classifies objects with pixel-level precision |
Workflow
All YOLO models follow three phases: Annotation → Training → Download.
1. Annotation
Upload images to the model dataset. Then select Annotate in the gallery or use the tag icon on the model card to open the integrated editor.
In the editor, draw bounding boxes for Object Detection or polygons and masks for Object Segmentation, assigning a class to each object. Changes are saved automatically.
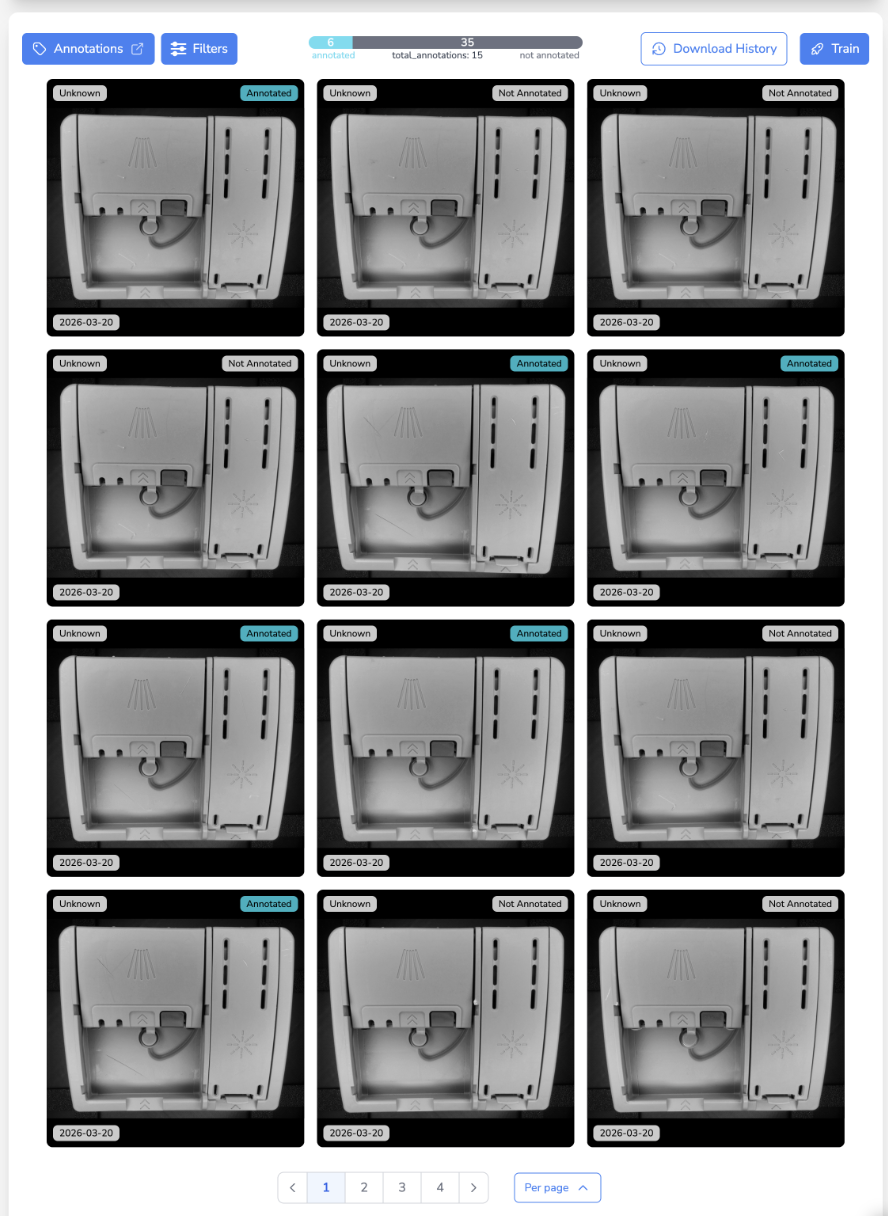
Back in the gallery, each image displays a badge:
| Badge | Color | Meaning |
|---|---|---|
| Not Annotated | White | Image has no bounding boxes or segmentation masks |
| Annotated | Cyan | Image contains saved annotations |
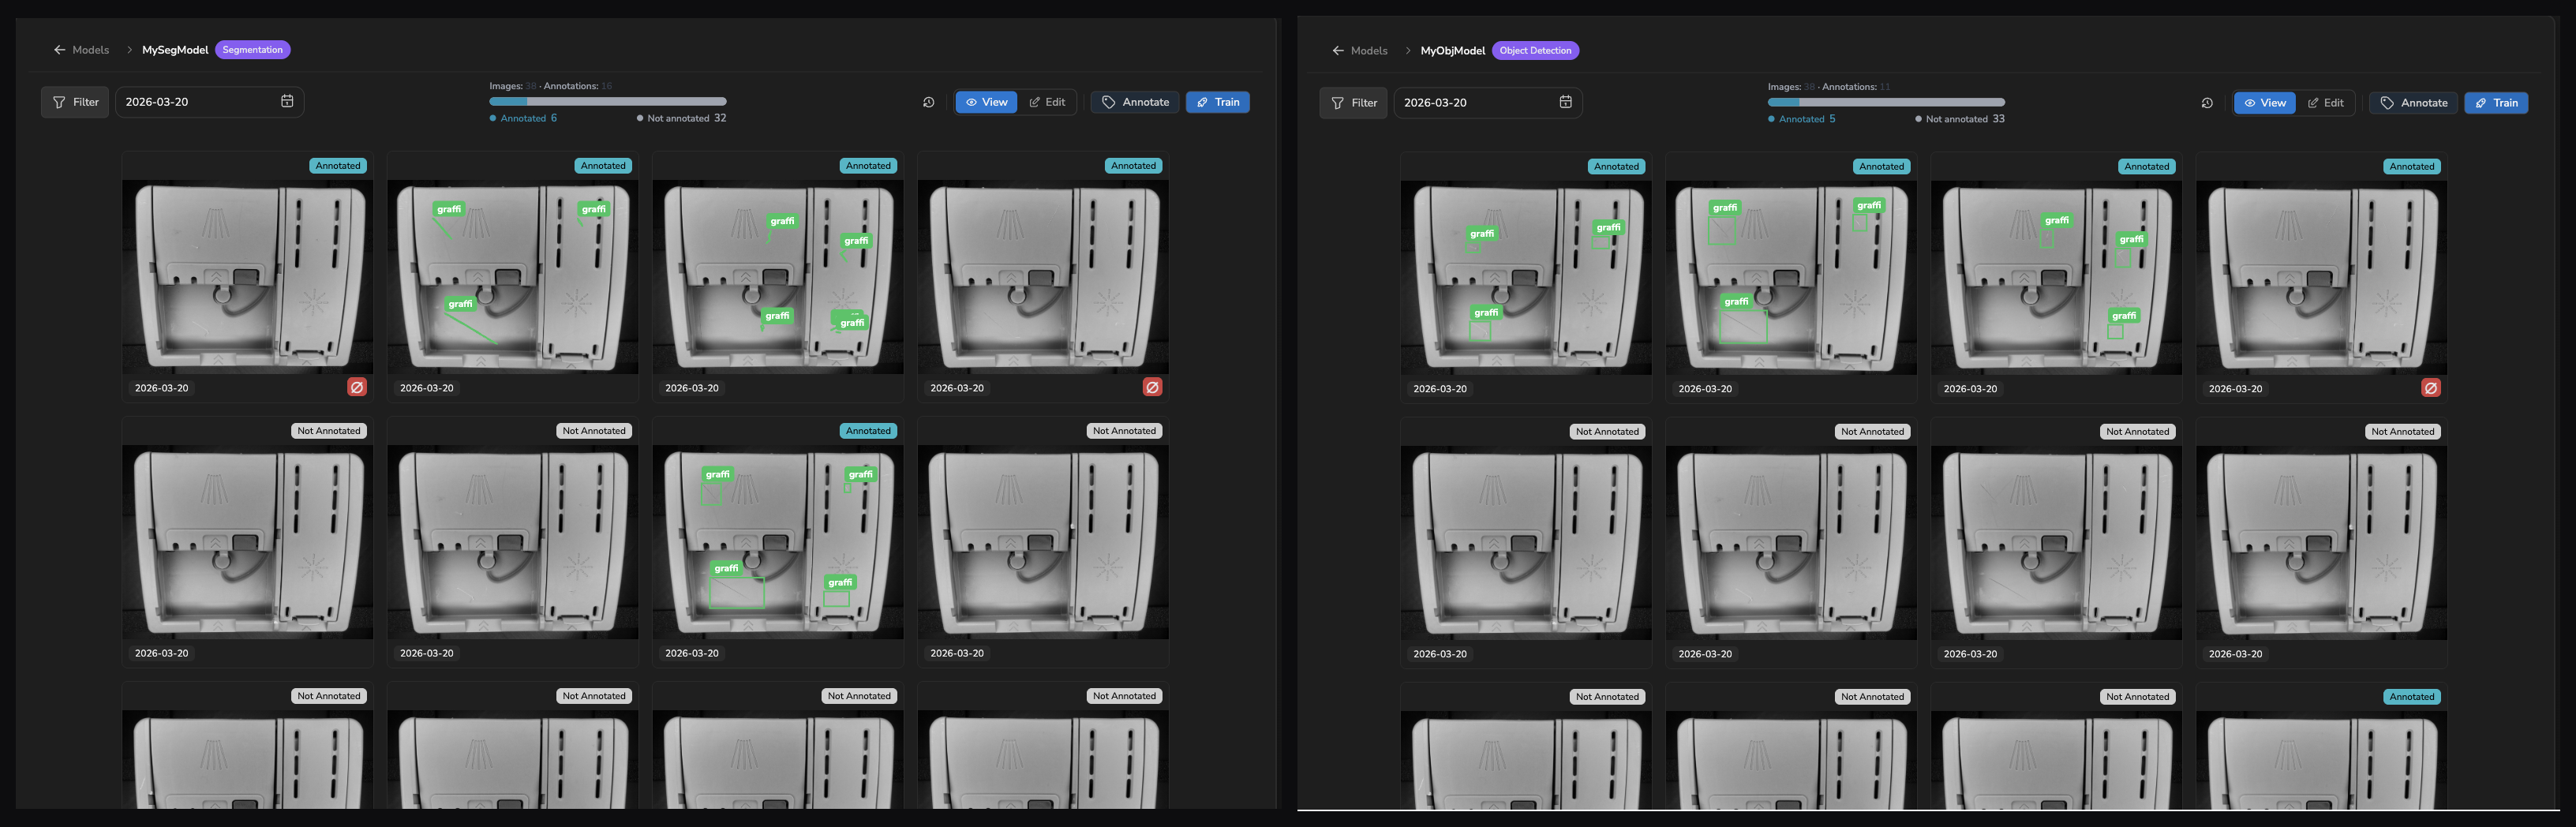
Use the Show Annotations toggle in the gallery filters to visualize bounding boxes and segmentation overlays directly on image thumbnails.
For tools, classes, saving, and shortcuts, see Annotation interface.
Minimum requirements to train:
- 5 annotated images
2. Training
Use Train model on the card to start directly after the requirements check, or select Train in the gallery to open the Pre-flight summary showing:
- Annotated images: current count / 5 minimum — ✅ or ❌
If the minimum is not met, a warning is displayed and the Start Training button is disabled.
Once training starts, the card displays status overlays such as Queued, Training…, Validating models…, and Uploading models….
3. Download
When training completes, the card displays Training Completed and an orange notification dot. Open Training History from the card or from the history icon in the gallery.
In the download modal:
- Expand a completed training run.
- Select an exported result; the highest-scoring one is preselected and marked suggested.
- Choose Target device….
- Select Download to generate and download the ZIP file in the browser.
The Compare feature is not available for YOLO models.
Gallery Features
In the gallery view for YOLO models:
- Image badges: each image shows an annotation status badge (white for not annotated, cyan for annotated)
- Annotate button: opens the integrated editor
- Show Annotations toggle: enables/disables bounding box and segmentation overlays on image thumbnails (enabled by default)
- Date range filter: filter images by capture date
Bounding Boxes & Segmentation Overlays
When the Show Annotations toggle is enabled:
- Bounding boxes (OBB) are drawn as stroked outlines around detected objects
- Segmentation masks are drawn as filled polygons with 20% opacity and a colored border
- Each class keeps the same color in the editor, gallery, and image viewer; its color can be customized in the editor
- Class labels are displayed above each bounding box
- Unlabeled items (class
-1) appear in gray with no label text - Overlays resize automatically when the browser window changes size
Compliance editing actions are not available for YOLO models.
Creating a YOLO Model
- Click + in the model list.
- Enter a model name and select Object Detection or Object Segmentation as the type.
- Optionally select source models to import datasets:
- From another YOLO model (same family): imports images + annotations (optional)
- From an AnomalyDetection model: imports images only
- Click Create Model.
See also Image gallery for filters, viewing, and bulk operations.