DefectClassification
Full workflow for DefectClassification models — hybrid training.
DefectClassification is a hybrid two-stage model that combines two different training phases. It first trains models to generate masks, then uses those masks for a segmentation training.
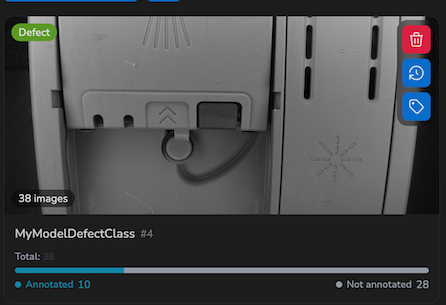
DefectClassification cards use the Classification type badge. Their statistics and available actions change between the Anomaly Detection and annotation phases.
Prerequisites
A DefectClassification model can only be created from an existing AnomalyDetection model. You must select an AnomalyDetection source model during creation — the dataset (images and compliance labels) is imported automatically.
You cannot create a DefectClassification model from scratch, from a YOLO model, or from another DefectClassification model.
Workflow
The DefectClassification model goes through four phases: Automatic AD Training → Annotation → YOLO Training → Download.
1. Creation + Automatic First Phase Training
When you create the DefectClassification model, the Anomaly Detection training starts immediately and automatically — there is no manual labeling or train step for this phase. The dataset and compliance labels are inherited from the source AnomalyDetection model.
During this phase, the card shows queue and training overlays. The first phase starts automatically when the model is created with a valid source dataset.
When the AD training completes, the card shows a completion notification and the annotation actions become available.
2. Annotation
The model transitions to the annotation phase. The tag icon becomes available on the card and Annotate appears in the gallery toolbar.
Open the integrated editor and annotate all defected images with bounding boxes. Changes are saved automatically and the gallery shows the status of each image:
| Badge | Color | Meaning |
|---|---|---|
| Not Annotated | White | Image has no bounding boxes |
| Annotated | Cyan | Image has been annotated |
Use the Show Annotations toggle in the gallery filters to visualize bounding box overlays on image thumbnails.
See Annotation interface for tools, classes, saving, and shortcuts.
Requirement: 100% of defected images must be annotated before training can start.
3. Training (after annotations)
Use Train model on the card to start directly after the requirements check, or select Train in the gallery to open the Pre-flight summary showing:
- Annotated images: current count / total defected — with the percentage
- All defected images must be annotated (100% required) — ✅ or ❌
Once training starts, the card displays status overlays including Training…, Generating masks…, Validating models…, and Uploading models….
4. Download
When training completes, the card displays Training Completed and an orange notification dot. Open Training History from the card or from the history icon in the gallery.
In the download modal:
- Expand a completed second-phase training run.
- Select an exported result and choose Target device….
- Select Download to generate and download the ZIP file in the browser.
Info Tooltip
The info tooltip content changes depending on the current phase:
During first phase:
Model Name
Model #ID — Type: DefectClassification
───
Total images: N
───
Images labeled: N
Good: N
Defected: N
During second phase:
Model Name
Model #ID — Type: DefectClassification
───
Total images: N
Defected images: N
───
Defected annotated: N / M
Gallery Features
The gallery features change depending on the current phase:
First Automatic Training Phase
- Image badges: compliance labels (green for Compliant, red for Defected, yellow for Uncertain)
- Compliance filter: filter by label
- The annotation interface is not available yet
Annotations Phase
- Image badges: annotation status (white for Not Annotated, cyan for Annotated)
- Annotate button: opens the integrated editor
- Show Annotations toggle: enables/disables bounding box overlays on thumbnails
- Date range filter: filter by capture date
Creating a DefectClassification Model
- Click + in the model list.
- Enter a model name and select DefectClassification as the type.
- Select an AnomalyDetection source model (required). Images and compliance labels are imported automatically.
- Click Create Model — the Anomaly Detection training starts immediately.
After creation, the card shows the queue or training status. No manual action is needed to start the first phase.
See also Image gallery for filters, viewing, and bulk operations.