Camera
Capture a frame from a physical camera connected to the system.
The Camera module acquires images from a physical camera configured in BIION-D. Place it before inferencers, Measurement modules or Plugins that need an image.
Module Card
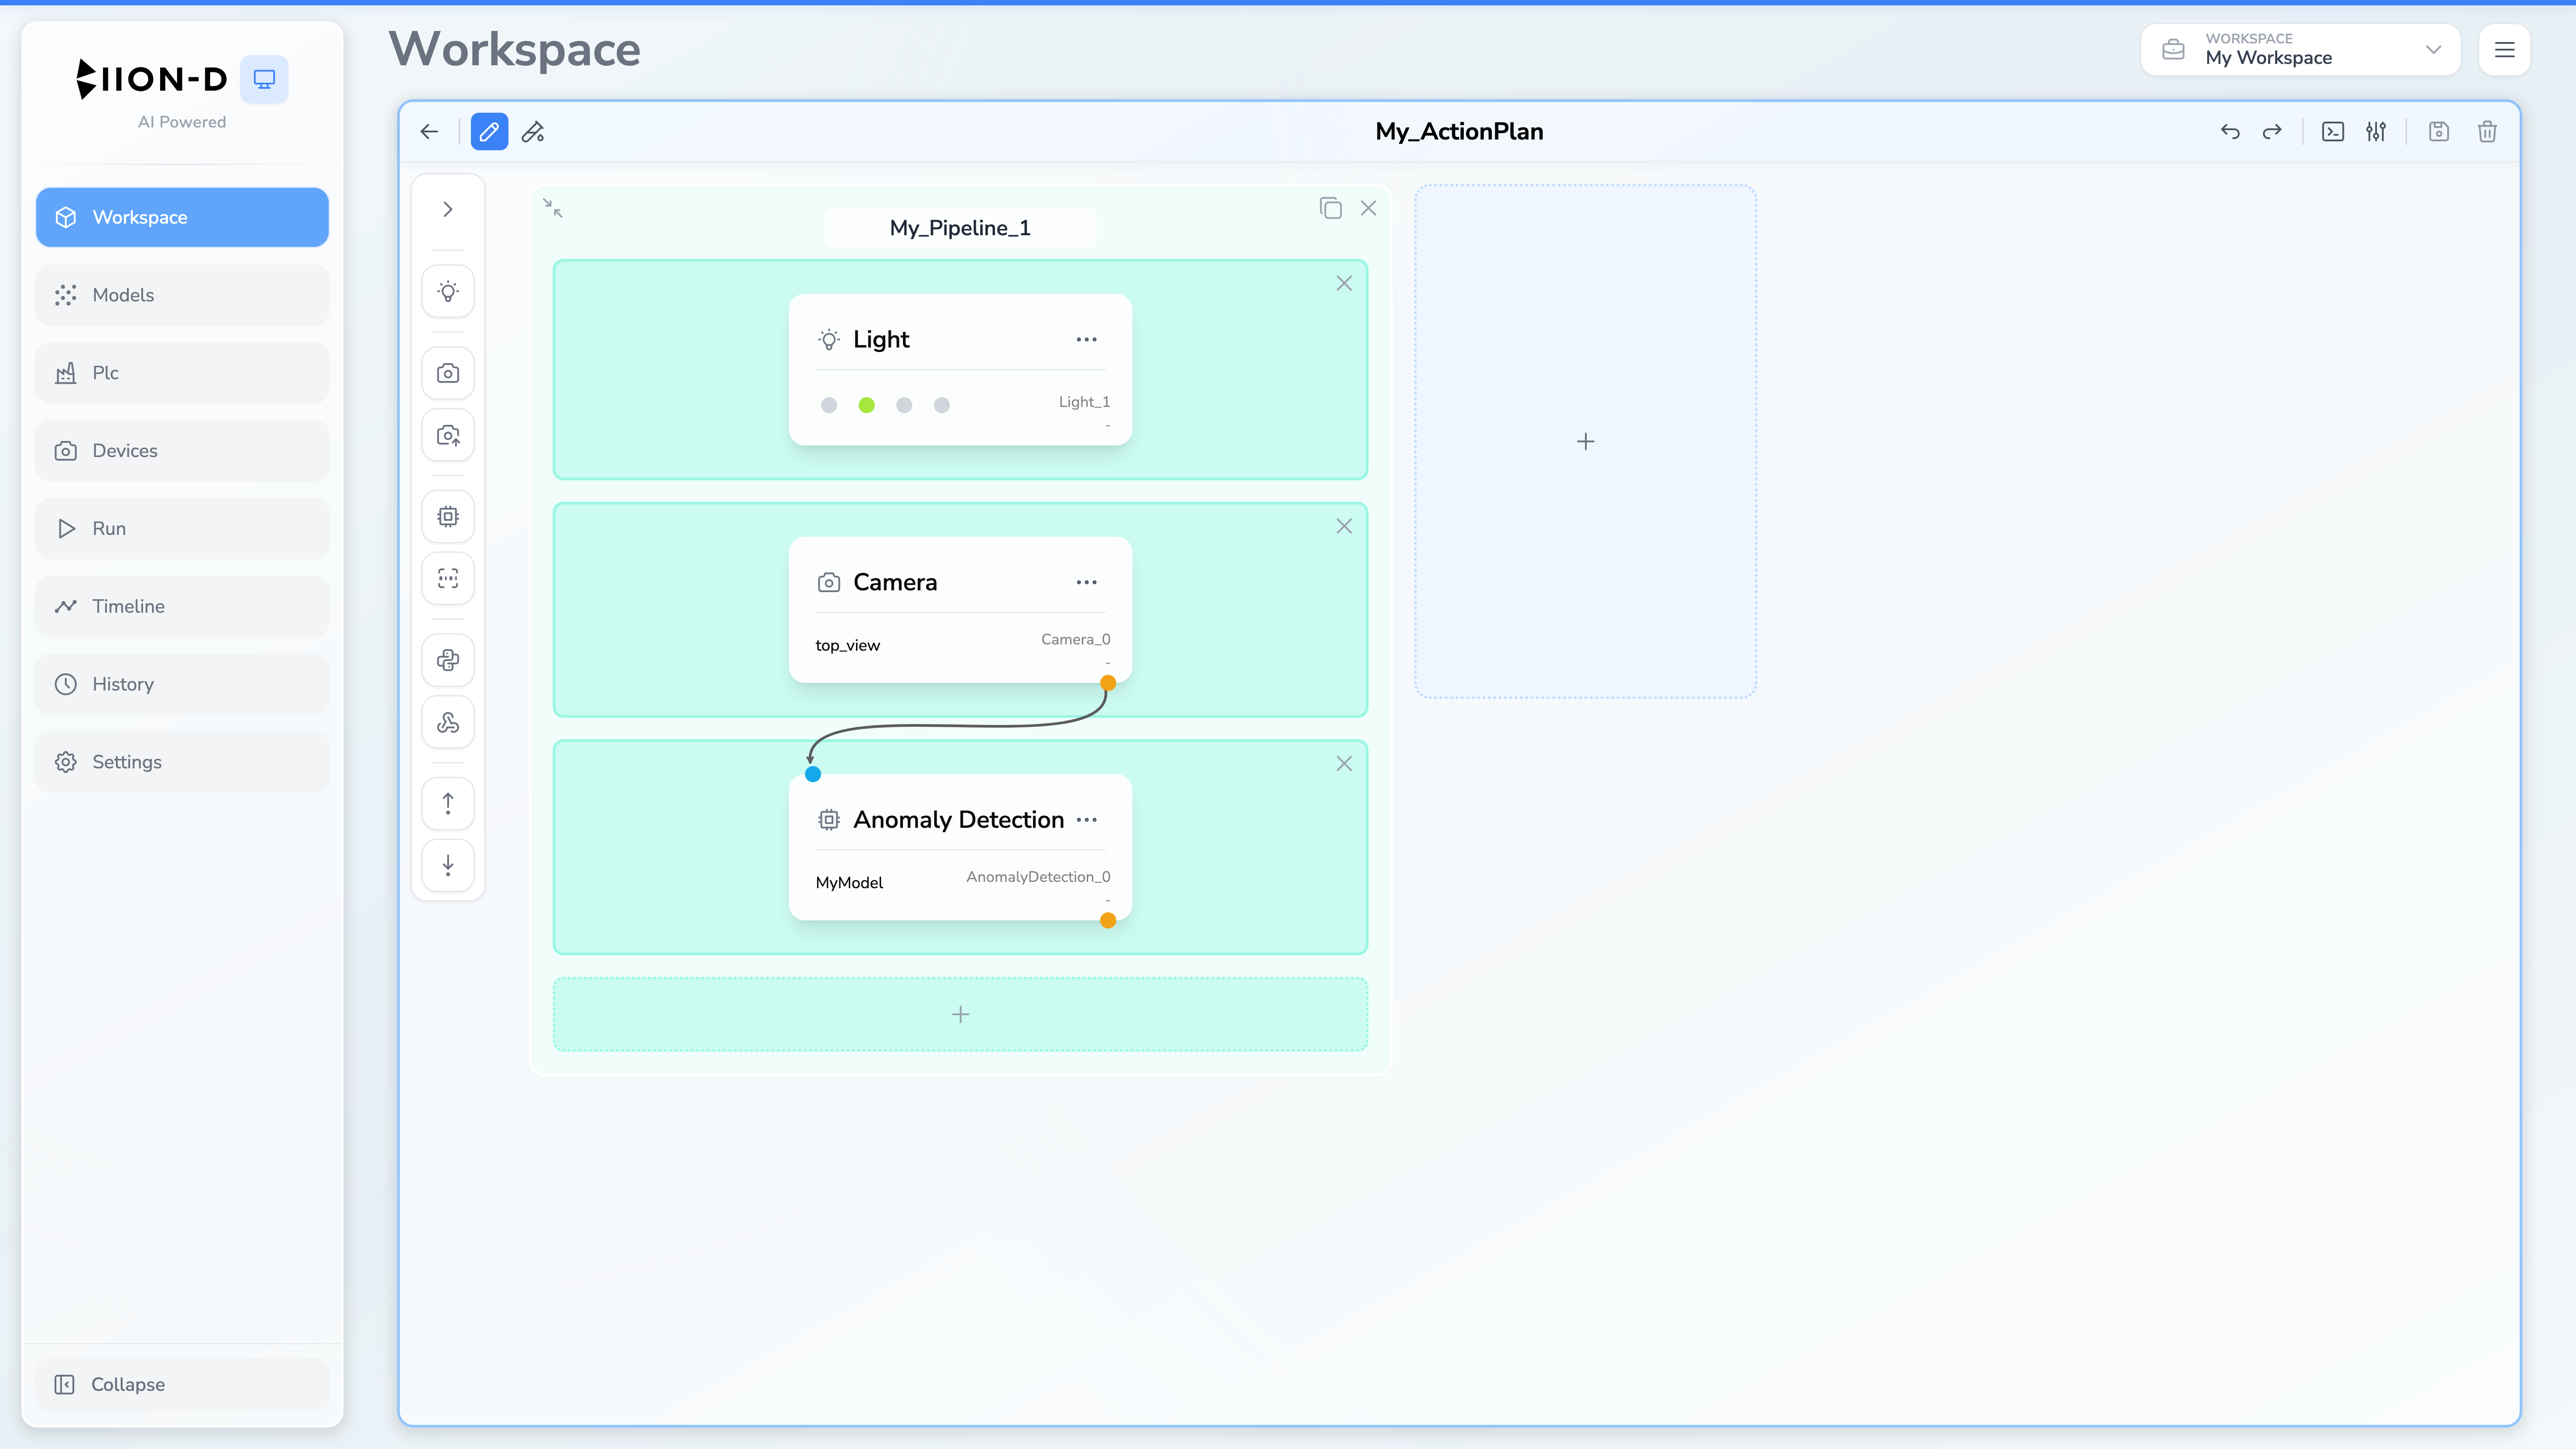
In the Action Plan editor, the card shows:
- the selected camera label;
- the module ID, such as
Camera_0; - the execution time after a test or run;
- an output connector for linking the image to later modules.
Open the ⋯ menu to copy the module data, paste previously copied compatible data or delete the module. Select the card itself to open its configuration.
Configure the Camera
Select a camera
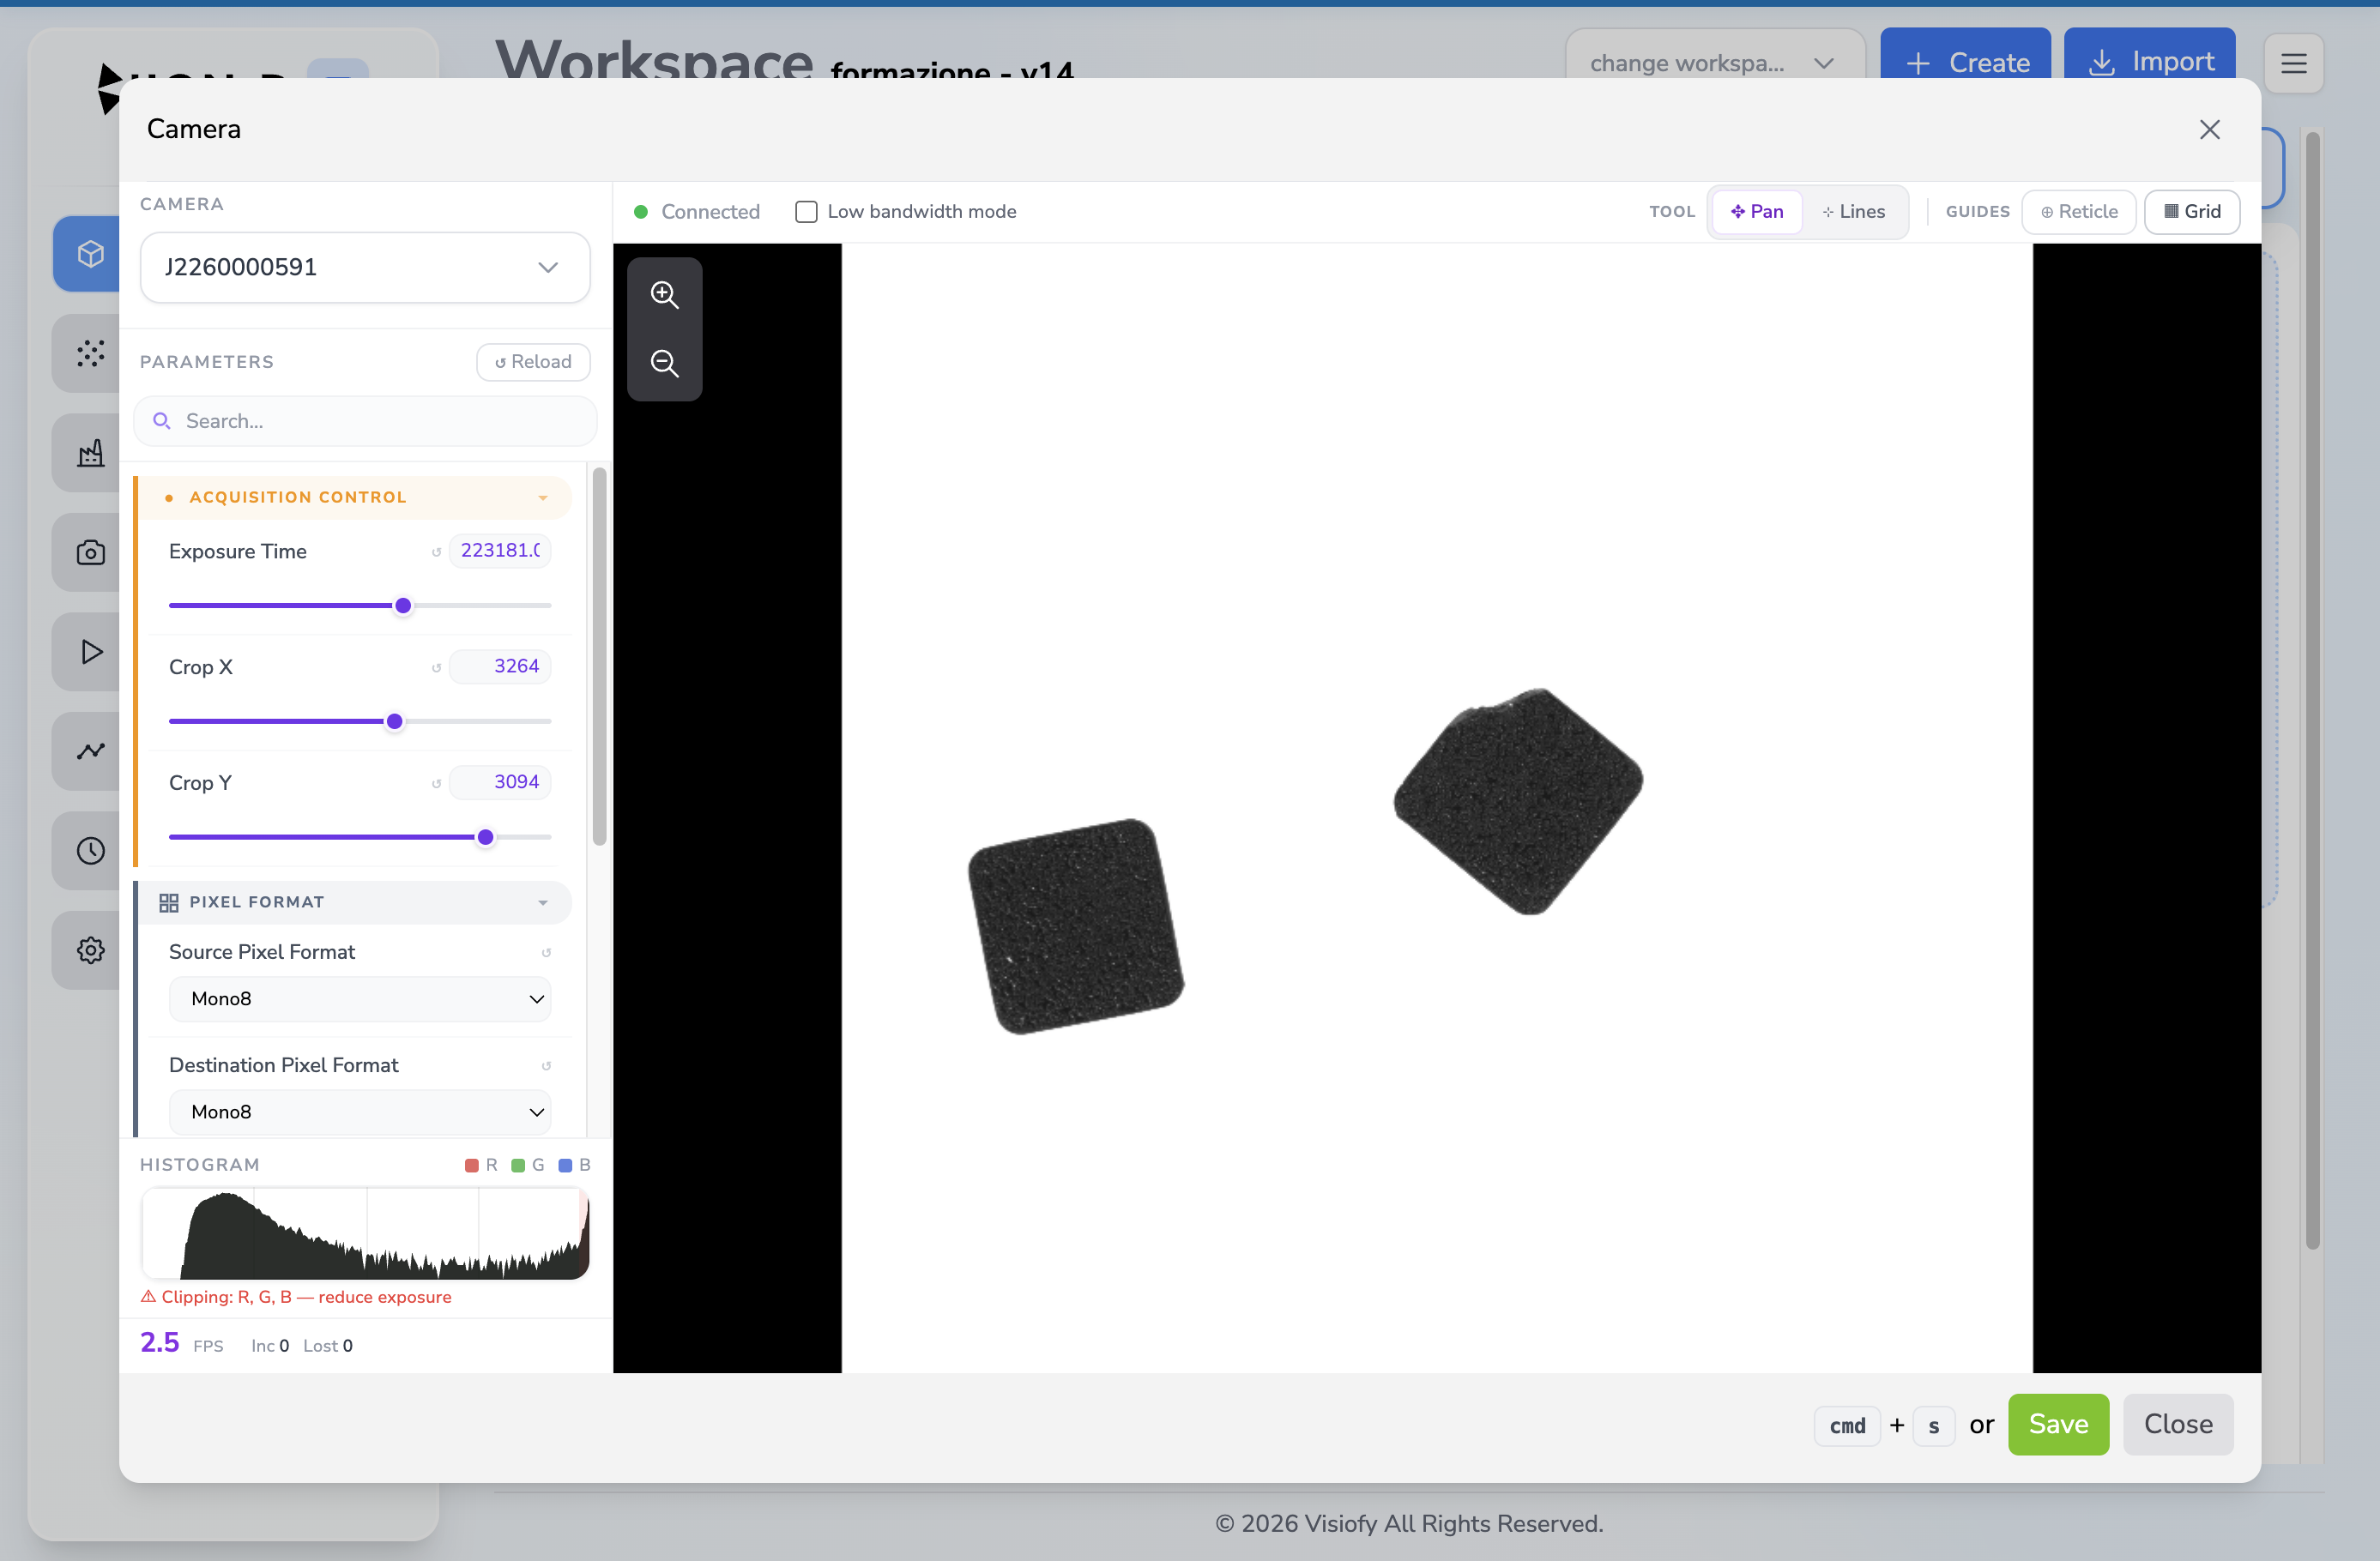
Choose a connected camera from the searchable Camera selector. The list shows the camera label and, when available, its model.
Changing the selected camera clears the settings inherited from the previous device and reconnects the live preview.
Frame the inspection area
Use the live image to position the camera and product. The status bar reports whether the stream is connecting, ready or unavailable.
The preview provides these inspection tools:
| Control | Purpose |
|---|---|
| Pan | Drag the enlarged image to inspect a different area |
| Zoom in / Zoom out | Magnify or reduce the preview without changing the acquired image |
| Reset zoom | Restore the complete image after zooming or panning |
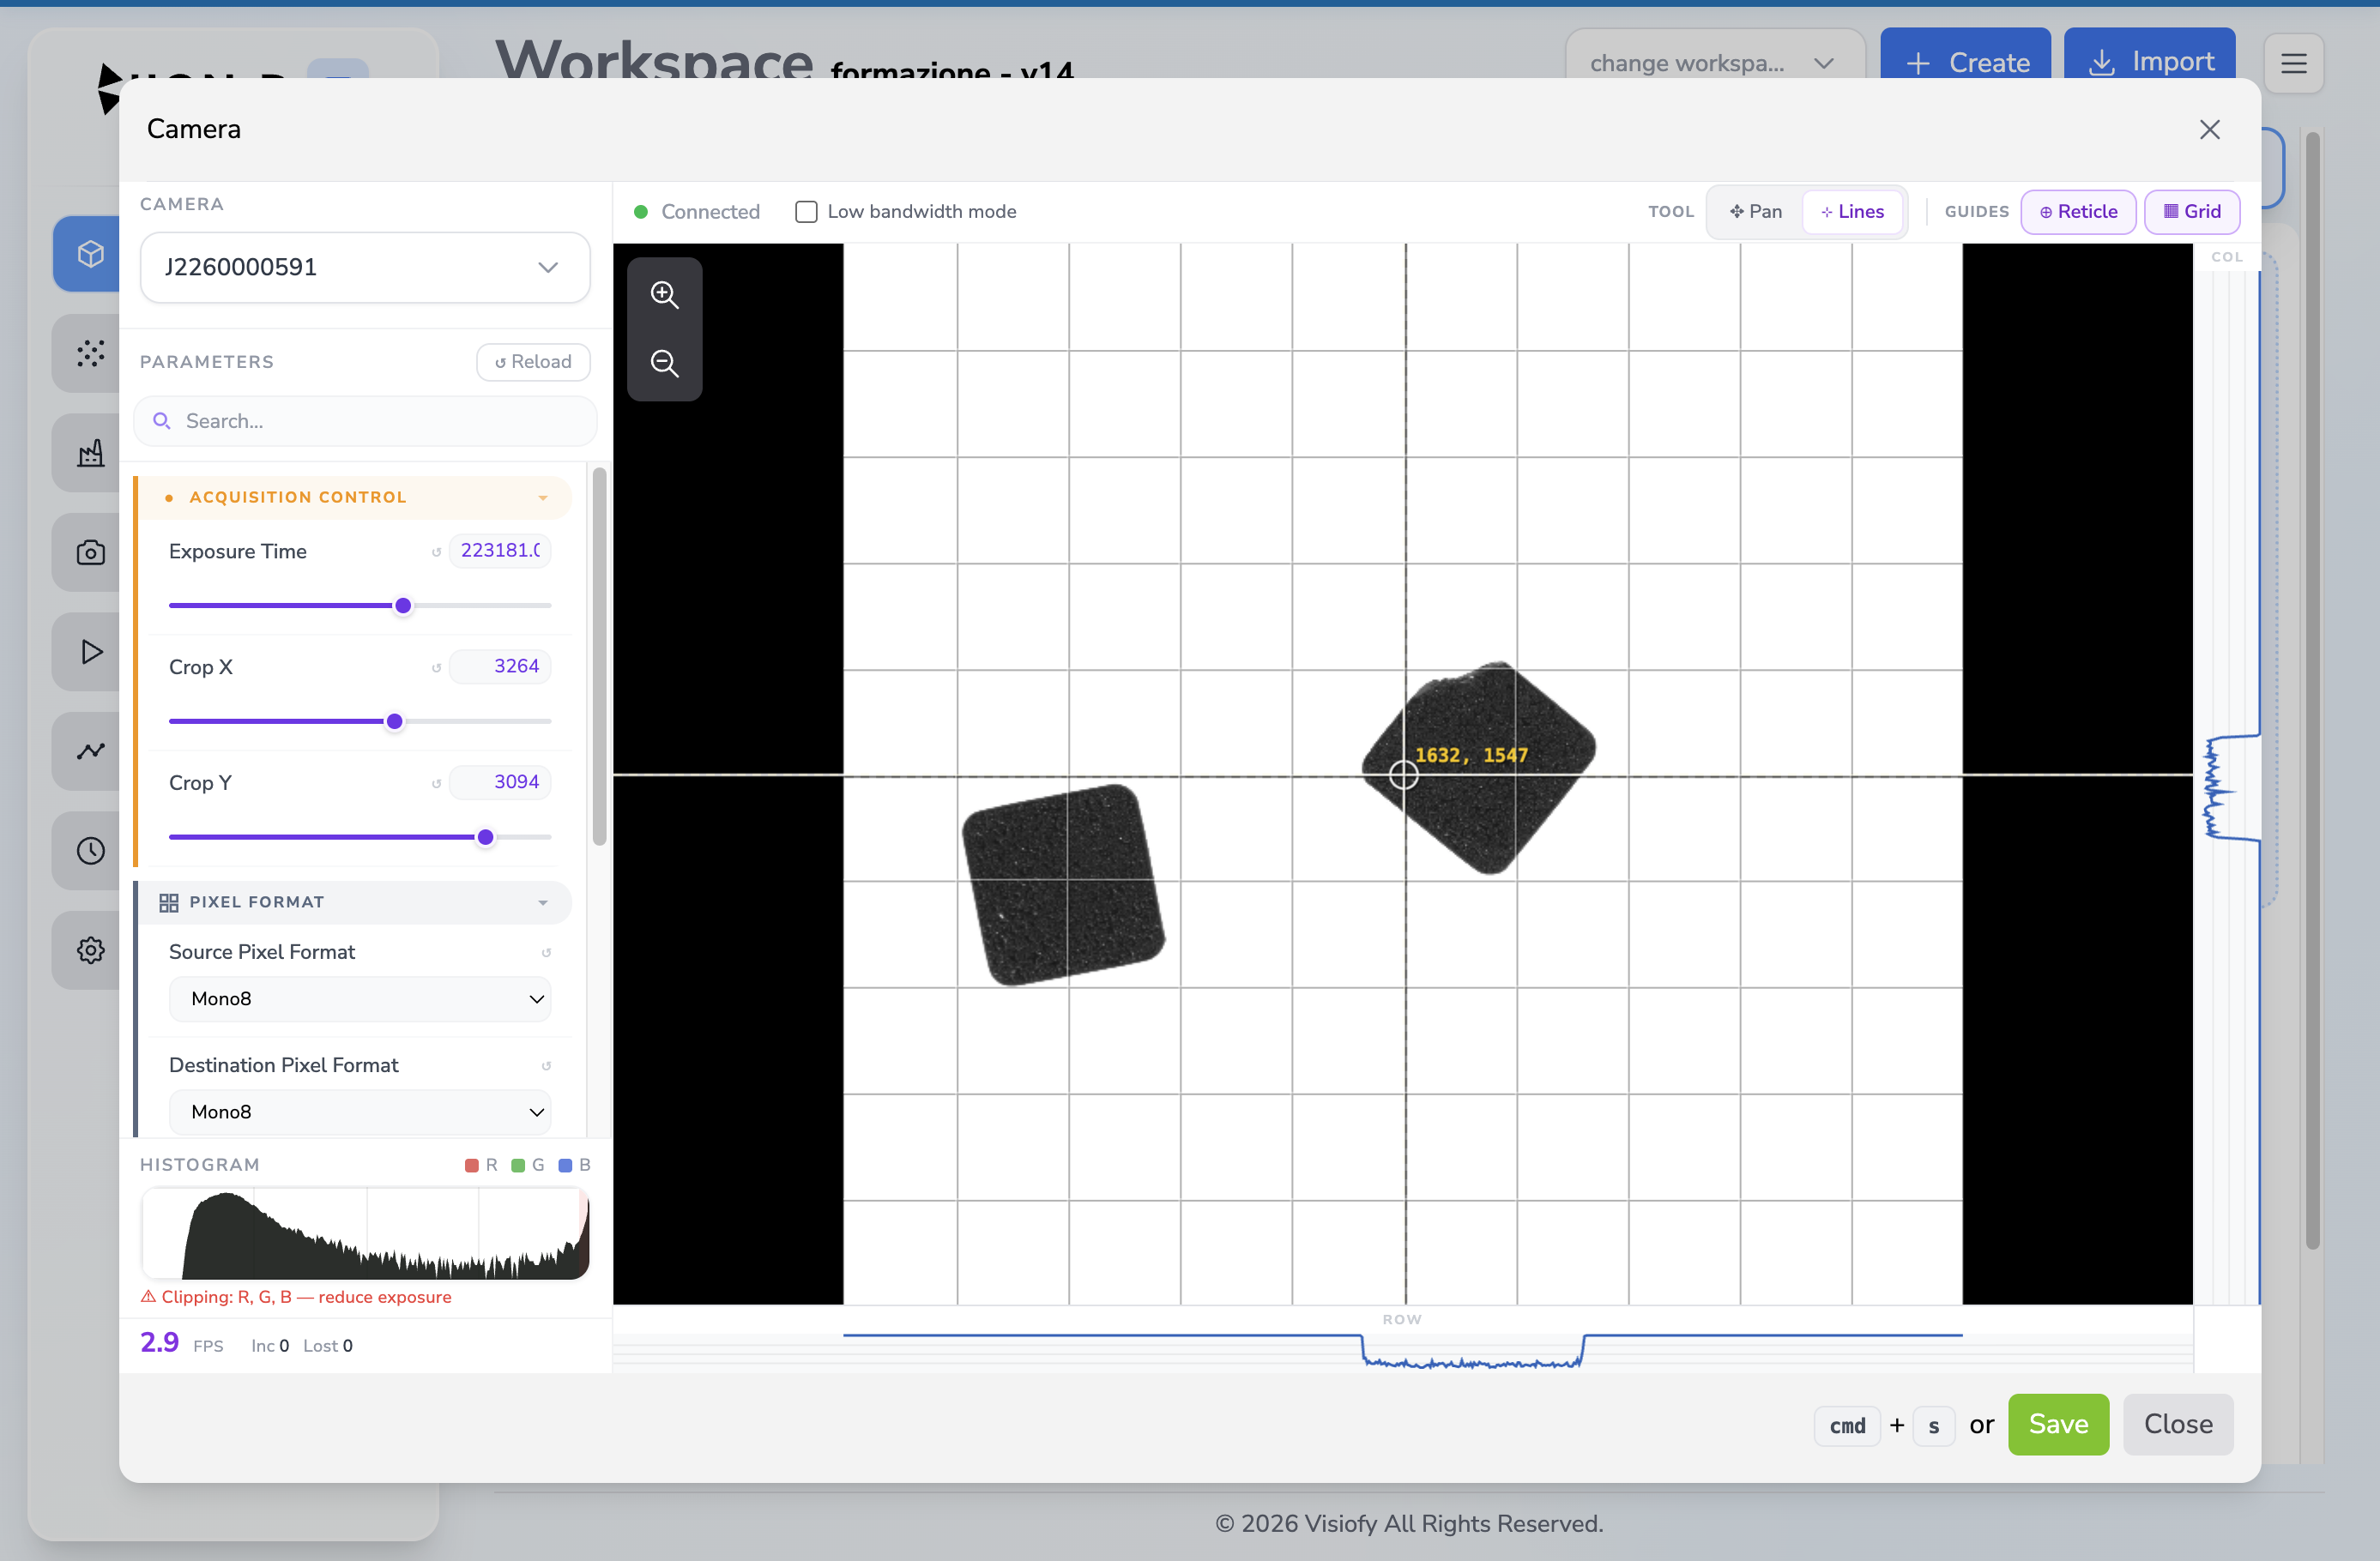
| Lines | Position a crosshair and inspect row and column pixel profiles |
| Reticle | Show or hide the center reference |
| Grid | Show or hide an alignment grid |
Pan, zoom, Lines, Reticle and Grid are preview aids. They do not modify the saved camera image.
Adjust the parameters
Camera parameters are loaded from the selected device and grouped by function, for example Acquisition Control, Polarization, Pixel Format, Color Correction, Post Processing, External Trigger and GEV Configuration.
The available groups and controls depend on the camera model and vendor. Use Search to find a parameter and Reload to read the current values from the device again.
For example, the camera shown above exposes Exposure Time, Crop X, Crop Y, source and destination pixel formats, Gamma, image reversal and Trigger Mode. A different camera may expose additional controls or omit some of these fields.
Some changes are applied immediately. Settings that require the camera to restart temporarily lock the panel while the device reconnects.
Check image quality
Use the RGB histogram and clipping warning to identify underexposed or saturated images. The status area also reports the preview frame rate and incoming or lost frames.
Enable Low bandwidth mode when working through a VPN or slow remote connection. Image quality is preserved, but the preview refresh rate is reduced.
Save the module
Select Save to store the selected camera and the values actually accepted by the device. BIION-D also refreshes the module outputs, which is important when enabling or changing polarization outputs.
Saved Configuration
| Field | Description |
|---|---|
| Camera | Camera label configured in Devices → Cameras |
| Parameters | Exposure, gain, acquisition, crop, trigger, pixel format and other settings supported by the selected device |
During Execution
When the pipeline reaches the Camera module, BIION-D:
- applies the saved parameters to the selected camera;
- waits for the device when a setting requires it;
- captures the configured frame or frames;
- makes the images available to later blocks.
After a test or run, open the module to review the selected camera, saved settings and captured image. When the acquisition produces multiple images, the result view displays them together in a grid.
If external triggering is enabled, the pipeline waits for the trigger before reading the frame. If no frame is ready within 5 seconds, execution fails with a frame-empty error.
Inputs & Outputs
| Direction | Key | Description |
|---|---|---|
| Input | None | The module reads directly from the selected camera |
| Output | <module_id>.frame |
Standard single-frame acquisition |
| Output | <module_id>.<polarization_label> |
One output for each enabled polarization image |
When polarization is disabled, the standard output is Camera_0.frame. When polarization is enabled, the output names follow the selections under Polarization Output. Reconnect downstream modules after changing these outputs.
| Rule | Description |
|---|---|
| Multi-camera exclusion | Two Camera modules using the same cam_label cannot be in the same block (same physical camera cannot snap twice simultaneously) |
| Light-camera exclusion | A Camera module and a Light module cannot be in the same block (lights must be set in a preceding block) |
Troubleshooting
| Message or state | What to check |
|---|---|
| No cameras detected | Confirm that the camera is connected, powered on and visible under Devices → Cameras |
| Waiting for camera… | Wait for a parameter change or camera restart to complete |
| Error loading configs | Check the camera connection, then use Reload |
| Preview frame losses | Check the network connection; use Low bandwidth mode for remote access |
| Empty frame after 5 seconds | Check the external trigger source and trigger configuration |